Cleaning the Vape
Keeping your Craftsman Series vape in tip-top shape ensures the best vaping experience. Regular cleaning not only enhances flavor but also extends the lifespan of your device by preventing buildup that can hinder performance.
Disassembling the Device
Cleaning your Craftsman Series vape is essential for maintaining optimal performance and flavor. Before you begin, gather the necessary supplies: cotton swabs, isopropyl alcohol (at least 70% concentration), a small brush or pipe cleaner, and a microfiber cloth.
- Start by disconnecting the battery from the tank.
- Remove any detachable parts, such as drip tips, airflow control rings, and the mouthpiece, and set them aside for cleaning.
- Dampen a cotton swab with isopropyl alcohol and gently wipe down all external surfaces of both the battery and the tank.
Use the small brush or pipe cleaner to remove any stubborn residue from air slots, threading areas, and inside the drip tip.
Rinse the removable parts thoroughly with clean water and allow them to dry completely before reassembling your vape.
Cleaning the Tank and Coils
Next, it’s time to tackle the tank and coils.
- Unscrew the base of the tank carefully to expose the coils.
- Use a cotton swab dipped in isopropyl alcohol to gently clean the exposed parts of the coils. Avoid excessive scrubbing as this can damage the delicate heating elements.
If your coils are particularly dirty, you may need to soak them in a small container of warm isopropyl alcohol for a few minutes before cleaning.
After cleaning, rinse the base of the tank and allow all components to air dry thoroughly before reassembling.
Cleaning the Mouthpiece
Cleaning the mouthpiece is crucial for maintaining good flavor and hygiene. Begin by removing the mouthpiece from your vape device.
Next, use a cotton swab dampened with isopropyl alcohol to gently wipe down the interior and exterior surfaces of the mouthpiece. Pay attention to any crevices or grooves where residue may accumulate.
For stubborn stains, you can soak the mouthpiece in a solution of warm water and mild soap for a few minutes before cleaning.
Rinse the mouthpiece thoroughly with clean water and allow it to air dry completely before reattaching it to your vape.
Maintaining Your Vape
Maintaining your Craftsman Series vape is crucial for ensuring optimal performance, flavor, and longevity. Regular cleaning not only removes buildup that can affect taste and airflow but also prevents potential damage to your device’s components.
Changing the Coils
Changing the coils in your Craftsman Series vape is a straightforward process that ensures continued optimal performance and flavor. Over time, coils can become worn out or clogged with residue, impacting your vaping experience. Here’s how to replace them:
- Remove the tank from the battery: Unscrew the base of the tank carefully.
- Identify the coil type: Check your Craftsman Series vape manual or the manufacturer’s website to determine the correct coil type for your device.
- Unscrew the old coil: Gently unscrew the old coil from the base of the tank.
- Clean the connection area: Use a cotton swab dipped in isopropyl alcohol to clean any residue or buildup from the connection point in the tank’s base. This ensures a secure and optimal connection with the new coil.
- Install the new coil: Screw the new coil firmly into the base of the tank, ensuring it’s securely fastened.
- Prime the new coil (if necessary):** Some coils require priming before use. Consult your coil’s instructions or the manufacturer’s website for specific priming steps.
- Reassemble the vape: Screw the tank back onto the battery, ensuring a secure connection.
After replacing the coil, allow some time for it to heat up and ensure proper wicking before vaping.
Refilling the Tank
Refilling the tank on your Craftsman Series vape is simple and straightforward. Start by unscrewing the base of the tank from the device.
Next, carefully pour your desired e-liquid into the tank’s fill port, avoiding overfilling. Most tanks have a maximum fill line indicated; avoid going beyond this to prevent leakage.
Once filled, screw the base back onto the tank and gently tap it on a flat surface to ensure the e-liquid settles around the coils.
Allow a few minutes for the e-liquid to saturate the wicking material before taking your first puff.
Storing Your Vape Properly
Proper storage of your Craftsman Series vape is essential for preserving its performance and extending its lifespan. When not in use, store your device in a cool, dry place, away from direct sunlight and extreme temperatures.
Keep the vape fully charged to prevent battery damage caused by prolonged discharge. A dedicated vape storage case can help protect the device from scratches and accidental drops.
Troubleshooting Common Issues
Troubleshooting common issues with your Craftsman Series vape ensures a smooth vaping experience. Understanding potential problems and their solutions empowers you to address them effectively, keeping your device performing at its best.
Leaking
One common issue is leaking. This can occur due to overfilling the tank, using e-liquid with too high of a VG (vegetable glycerin) content, or a faulty o-ring seal. To fix leaking, start by emptying the tank and ensuring it’s not overfilled. Check the o-rings for damage or wear and replace them if necessary. Consider using an e-liquid with a lower VG content.
Another issue is poor flavor. This can be caused by dirty coils or a clogged airflow system. Regularly clean your coils as described in the previous steps. Also, inspect and clear any blockages in the air slots or airflow control rings.
If your vape produces weak vapor, ensure the battery is properly charged and connected to the tank. Check the coil resistance and replace it if it’s too high, indicating a worn-out coil. Finally, make sure the airflow settings are not overly restricted.
Poor Vapor Production
Poor vapor production can stem from several factors. First, ensure your battery is fully charged and securely connected to the tank. Check the resistance of your coils; excessively high resistance indicates a worn-out coil requiring replacement.
Inspect your airflow settings; overly restricted airflow can lead to weak vapor. Make sure the air slots are clear and unobstructed, and experiment with different airflow settings to find the optimal balance for your preference.
Lastly, consider the type of e-liquid you’re using. A higher VG (vegetable glycerin) content often produces thicker vapor, while a higher PG (propylene glycol) content might result in thinner vapor.
Burnt Taste
A burnt taste in your vape can be caused by several things.
- Dry Hits: When the wick isn’t saturated with e-liquid, it burns, producing a burnt taste. Make sure to prime your coils properly and take short puffs to allow the juice time to reach the coil.
- Overheating: Vaping at too high of a wattage or for extended periods can overheat the coils and produce a burnt taste. Adjust your wattage down and limit vaping sessions.
- Coils Need Replacing: Over time, coils degrade and become less effective, leading to a burnt taste. Replace your coils according to the manufacturer’s recommendations.
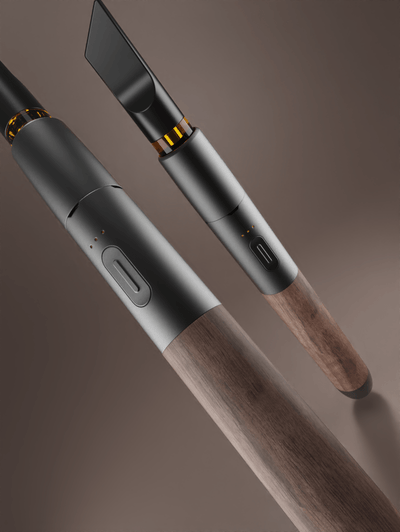
Buy Vessel Craftsman pens for a superior experience
- Why Does My Top Lip Stick Out After Filler - November 14, 2025
- What Is The Difference Between Lip Filler And Lip Flip - November 11, 2025
- What Are The Best CBD Gummy Sweets For Sleep Improvement - November 10, 2025